
Looking to impress your friends with a gift presentation that’s as delightful as the present itself? Making a wrapping paper bag is the crafty way to do it! Not only does it add a personal touch to your gifts, but it also gives those boring gift bags a run for their money. Say goodbye to the same old store-bought options and hello to a fun, eco-friendly alternative that’ll have everyone talking.
Materials Needed
Creating a wrapping paper bag requires several materials. Gathering these items beforehand streamlines the crafting process.
Types of Wrapping Paper
Different types of wrapping paper enhance the bag’s look. Craft paper offers durability and a rustic charm. Glossy paper adds a sleek finish and vibrant colors. Recycled paper provides an eco-friendly option that maintains style. Patterned paper can infuse personality into gift presentations. Choosing the right paper type sets the tone for the entire gift.
Other Supplies
Basic supplies include scissors and tape for constructing the bag. A ruler helps measure dimensions accurately, ensuring a perfect fit. A pencil allows for precise marking before cutting. String or ribbon serves as a decorative closure, adding elegance. For added creativity, consider using stamps or stickers to personalize the bag further. These elements enhance the overall appearance, making each bag unique.
Step-by-Step Instructions
Creating a wrapping paper bag involves several straightforward steps. Follow these detailed instructions to craft an impressive gift carrier.
Measuring and Cutting
Start by selecting the wrapping paper of choice. Cut a rectangular piece measuring 20 inches by 30 inches for a medium-sized bag. Use a ruler to ensure straight edges. Mark the measurements with a pencil to maintain accuracy. After cutting the piece, inspect it for any rough edges and trim if necessary. This precise measurement provides the foundation for the bag’s shape.
Folding Techniques
Next, prepare the bag’s sides through folding. Fold the long edges inward by 2 inches to create the side seams. Ensure the folds are even to maintain balance. Afterward, fold the bottom edge up by 5 inches, forming the base. Crease the folds firmly for better structural integrity. Recheck that all folds are aligned correctly for a polished finish.
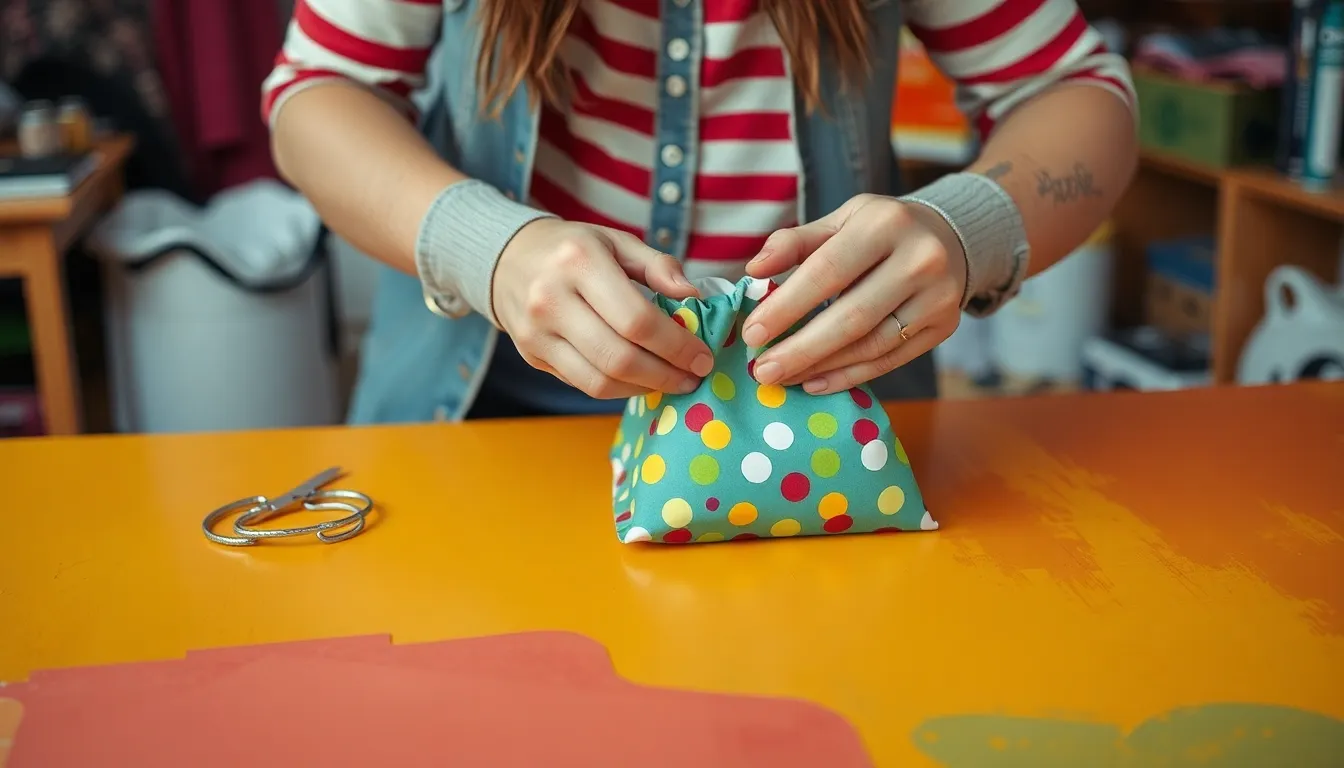
Assembling the Bag
Now begins the assembly phase of the bag. Apply tape along the inner edges of the side folds to secure them. Reinforcing the bottom fold with tape prevents the bag from opening unexpectedly. After taping the sides and bottom, turn the bag inside out for a neat appearance. Finally, create handles by cutting two strips of wrapping paper, each measuring 1 inch by 10 inches, and attach to the sides with tape. This completes the bag, ready for gifting.
Customization Ideas
Personalizing a wrapping paper bag enhances its aesthetic value and makes gifts more memorable. Here are some creative approaches to customize your bags.
Design Options
Experimenting with different designs can elevate the look of a wrapping paper bag. Consider using patterned wrapping paper to add flair. Choose seasonal designs for holidays or events, such as floral prints for spring or snowflakes for winter. Incorporating personalized messages or initials can make gifts more special. Utilizing stencils adds unique shapes or patterns, allowing creativity to shine. Adding wash tape or washi tape creates borders or accents, enhancing the bag’s visual appeal. Don’t hesitate to mix and match styles to create a visually striking gift carrier.
Adding Handles
Including handles significantly improves functionality and style. Cut strips of wrapping paper, each measuring about 1 inch wide and 15 inches long, for durable handles. Attach the handles by folding them and securing them inside the bag using tape. Decorative string or twine can replicate a rustic look, adding charm. Another option involves using ribbon for a more elegant appearance. Folding the edges of the handles adds stability, ensuring they withstand the weight of the contents. Personalizing handles with embellishments, like stickers or charms, enhances the overall design and functionality.
Tips for Success
Crafting a wrapping paper bag involves attention to detail and creativity. Following these tips can enhance the crafting experience.
Common Mistakes to Avoid
Misjudgments often lead to frustration. Cutting wrapping paper without precise measurements can result in awkwardly sized bags, so using a ruler is key. Failing to crease folds firmly can hinder structural integrity, which weakens the bag. Skipping the step of sealing edges thoroughly with tape could cause the bag to fall apart, especially when holding heavier items. Overlooking the positioning of handles can affect functionality, so ensuring they are securely attached is crucial for balance and strength.
Storage and Usage
Storing wrapping paper bags properly extends their lifespan. Keeping them in a cool, dry place prevents moisture damage. It’s beneficial to stack bags flat rather than crumpling them to maintain their shape. Using these bags for various occasions, such as birthdays and holidays, maximizes their versatility. Additionally, personalizing each bag for different recipients adds a special touch that recipients will appreciate. Select decorative elements that match the occasion to enhance their visual appeal and make gifts more memorable.
Creating a wrapping paper bag is a fun and rewarding way to add a personal touch to gift-giving. This eco-friendly option not only showcases creativity but also elevates the overall presentation of gifts. By following the outlined steps and incorporating unique decorative elements, anyone can craft a bag that stands out.
With attention to detail and a bit of imagination, the process becomes an enjoyable activity suitable for any occasion. Whether it’s a birthday, holiday, or special event, these handmade bags are sure to impress recipients and make gifts even more memorable. Embracing this crafty approach not only reduces waste but also reflects thoughtfulness in gift presentation.