Table of Contents
ToggleA built-in refrigerator isn’t just an appliance, it’s the anchor of a high-end kitchen design. If you’re planning a serious renovation, a KitchenAid built-in refrigerator delivers the seamless look that custom cabinetry promises, with reliable performance to match. Unlike countertop models that protrude awkwardly, built-in units integrate flush with your cabinet run, creating clean sightlines and professional polish. Whether you’re upgrading to a KitchenAid 48 inch refrigerator for a sprawling kitchen or retrofitting a standard-sized space, this guide walks you through what these units bring to the table, how to plan for installation, and what maintenance keeps them running strong for decades.
Key Takeaways
- A KitchenAid built-in refrigerator integrates flush with cabinetry for a seamless, high-end kitchen design that countertop models cannot achieve.
- Dual compressors and variable-temperature zones in KitchenAid models maintain independent control over fridge and freezer conditions, ideal for diverse food storage needs.
- A KitchenAid 48 inch refrigerator provides 24-30 cubic feet of storage and requires precise cabinetry planning—measure your opening in three places and verify ventilation requirements before purchase.
- Professional installation ($200–$500) is essential for proper leveling, ventilation, and electrical connections to prevent warranty issues and premature failure.
- Quarterly coil cleaning, monthly door seal checks, and professional water line maintenance are the key maintenance tasks that extend lifespan to 15-20 years.
What Makes KitchenAid Built-In Refrigerators Stand Out
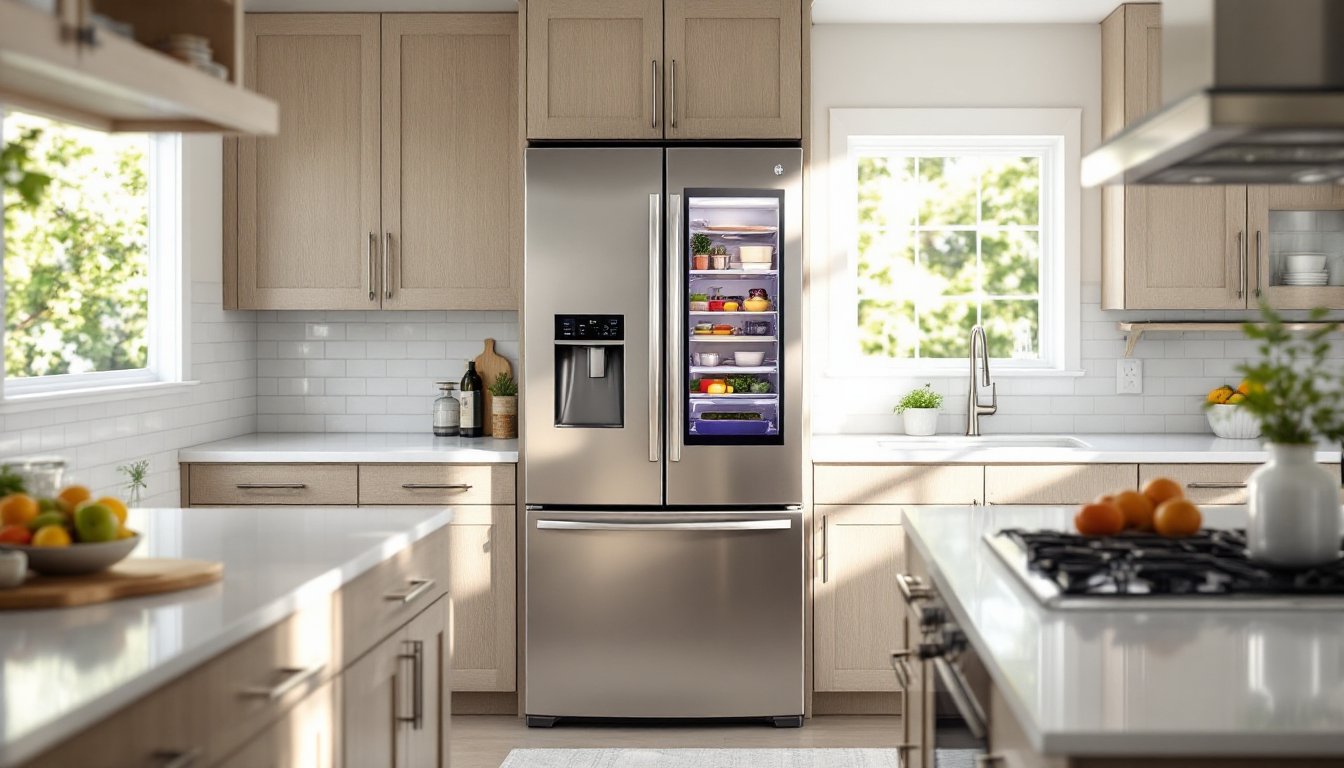
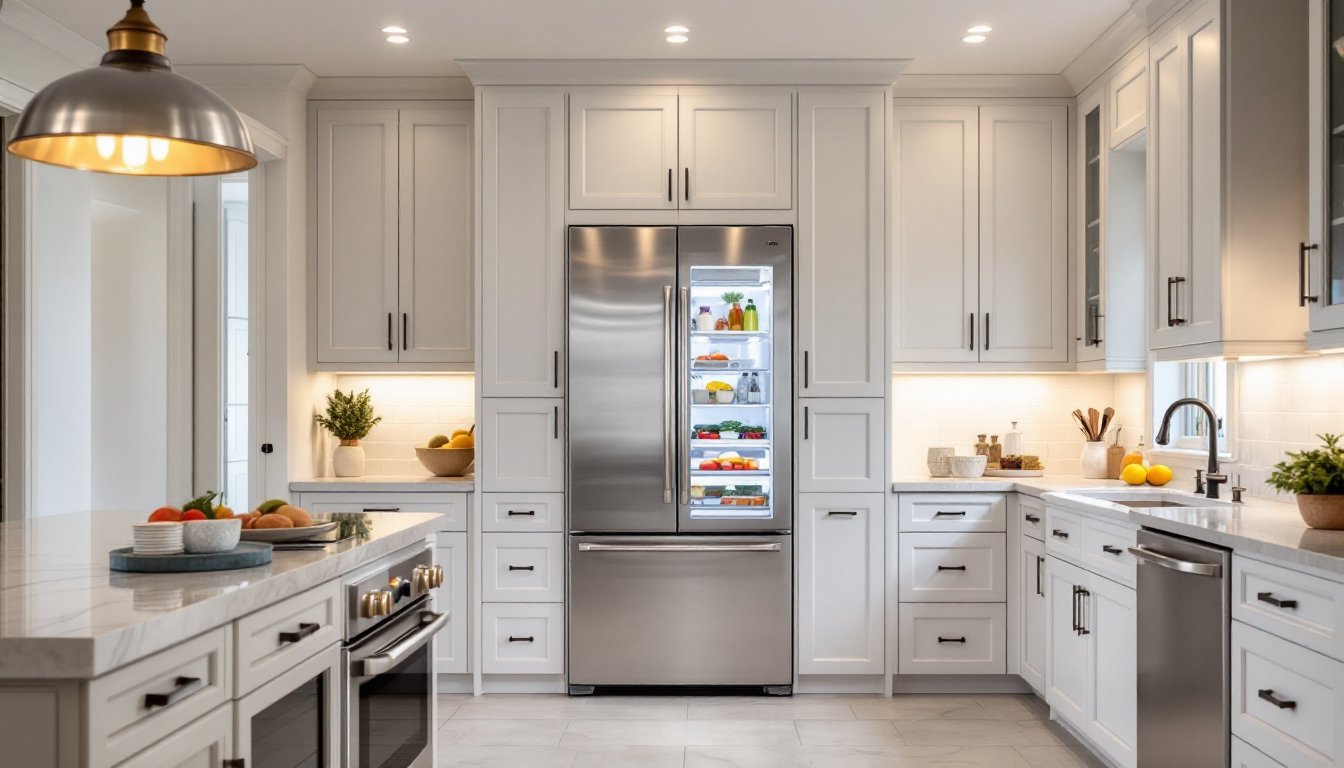
KitchenAid built-in refrigerators earn their premium price tag through engineering and finish options you won’t find in standard appliances. These units are designed to sit flush with cabinet faces, requiring specialized frames and ventilation paths that demand precision during installation. The stainless-steel options don’t just look sleek, they’re engineered to resist fingerprints and maintain that high-end sheen longer than lesser-grade materials.
Where built-ins really shine is capacity and control. A KitchenAid 48 inch refrigerator, for example, spans nearly four feet in width and delivers roughly 24-30 cubic feet of storage, plenty for families serious about meal prep. Dual compressors in most models maintain independent temperatures for the fridge and freezer, so you’re not cycling one compartment just to adjust the other.
The interior layout reflects thoughtful design: adjustable shelving, spill-containment trays, and drawer systems that let you organize by food type rather than cramming everything in. Many KitchenAid models include humidity-controlled crisper drawers and deli compartments that keep meats and cheeses at ideal conditions without drying them out. Builders and renovators favor KitchenAid for reliability, these appliances tend to hold value and perform predictably over 15+ years if maintained properly.
Key Features and Specifications to Consider
Before committing to a built-in refrigerator, nail down the specifications that matter to your household.
Capacity and Dimensions are the first filters. Standard built-in depths run 24-27 inches (front of cabinet face to back wall), while width options range from 30 inches (compact) to 48 inches (full width). Height depends on ceiling and cabinetry: most sit between 84-90 inches floor-to-top. Measure your opening twice, accounting for any soffit or overhead obstructions. A built-in KitchenAid refrigerator requires the surrounding cabinetry to be ready first, you can’t retrofit the unit later if the cabinet opening is off by half an inch.
Finish and Materials matter beyond aesthetics. Stainless steel resists corrosion but shows fingerprints: some KitchenAid models offer fingerprint-resistant coatings. Panel-ready doors integrate with your cabinet finish for a seamless look, though that means replacing custom panels if styles change later.
Temperature and Humidity Control separates good from great. Variable-temperature zones let you set wine, deli, or produce sections to precise conditions. Even distribution matters, units with multiple evaporators and dampers prevent frost buildup and uneven cooling.
Advanced Cooling Technology and Storage Options
Many KitchenAid built-in models feature dual compressors, allowing independent fridge and freezer temperatures without one side suffering if the other runs longer. This is especially valuable if you keep produce, dairy, and frozen items at different rates. Some units include smart-home connectivity, letting you check temperature or adjust settings from your phone, handy if you’re out of town or simply checking before grocery shopping.
Storage innovation includes flip-up shelves that adapt to tall bottles or platters, adjustable door bins with spill trays, and sliding drawers that pull fully out for easy access. Wine storage models maintain 45-65°F (ideal for red and white varietals), while deli compartments hold 35-40°F for meats and cheeses. Ice-maker options are standard on most KitchenAid units, confirm plumbing access before purchase, as retrofitting water lines into finished walls is a plumber’s job, not a DIY afternoon project.
Design and Installation Essentials
Installation of a built-in KitchenAid refrigerator is not a simple unbox-and-plug scenario. Professional installation runs $200–$500 depending on complexity, and in many cases, it’s worth every penny. The unit must be leveled (absolutely critical, fridges that tilt slightly toward the back won’t close properly and will leak water), ventilation paths must be clear, and electrical connections must meet code.
Cabinetry Prep is half the battle. The cabinet opening needs to be square and level. If your kitchen cabinets sit on tile or hardwood that’s even slightly out of plane, the refrigerator opening might twist slightly, making doors misalign. Installers check this early: correcting it later involves shimming or sometimes rebuilding sections of cabinetry.
Ventilation requirements differ by model. Some KitchenAid built-in units pull air from below the unit and exhaust heat out the back: others require a soffit vent or connection to a hood system. Read the installation manual before you finalize cabinet layouts, placing the unit in a corner or under a solid soffit without proper ventilation planning leads to premature failure and voided warranties.
Measuring and Planning Your Kitchen Remodel
Start by measuring the existing opening in three places: top, middle, and bottom of the cabinet run. Differences of more than ¼ inch suggest the cabinetry is out of square. Check depth from the cabinet face to the back wall, and note any electrical outlets, water lines, or gas lines behind the space. A built-in KitchenAid refrigerator needs adequate clearance on at least one side for door swing and maintenance access.
Consult the manufacturer’s spec sheet (available on KitchenAid’s site or through appliance retailers) for exact rough-opening dimensions and ventilation requirements. Many builders order the refrigerator early in the remodel and design cabinetry around it, rather than hoping a standard opening will accommodate a premium unit. Compare models using detailed reviews from appliance experts to see how a KitchenAid 48 inch refrigerator stacks up against competitors in your price range.
Electrical is straightforward: a standard 120V circuit feeds most units, but confirm amperage requirements on the nameplate. Water line installation (for ice makers or water dispensers) should be done by a licensed plumber using ¼-inch copper or approved plastic tubing, with an isolation valve installed at the source for easy shutoff if repairs are needed.
Maintenance Tips for Long-Term Performance
A well-maintained built-in refrigerator easily lasts 15-20 years. Most failures stem from neglect rather than manufacturing defect.
Coil Cleaning is the single most important task. Dust accumulating on the condenser coils (usually at the back or base of the unit) forces the compressor to work harder, consuming more power and shortening lifespan. Unplug the unit, vacuum the coils with a brush attachment quarterly, and wipe down the exterior condenser area. This takes 20 minutes and costs nothing.
Door Seals should be checked monthly. If the seal degrades, the unit compensates by running constantly, wasting energy and wearing components faster. Run a dollar bill around the seal, if it slides out easily, the seal has lost compression and needs replacing (a $150–$300 service call).
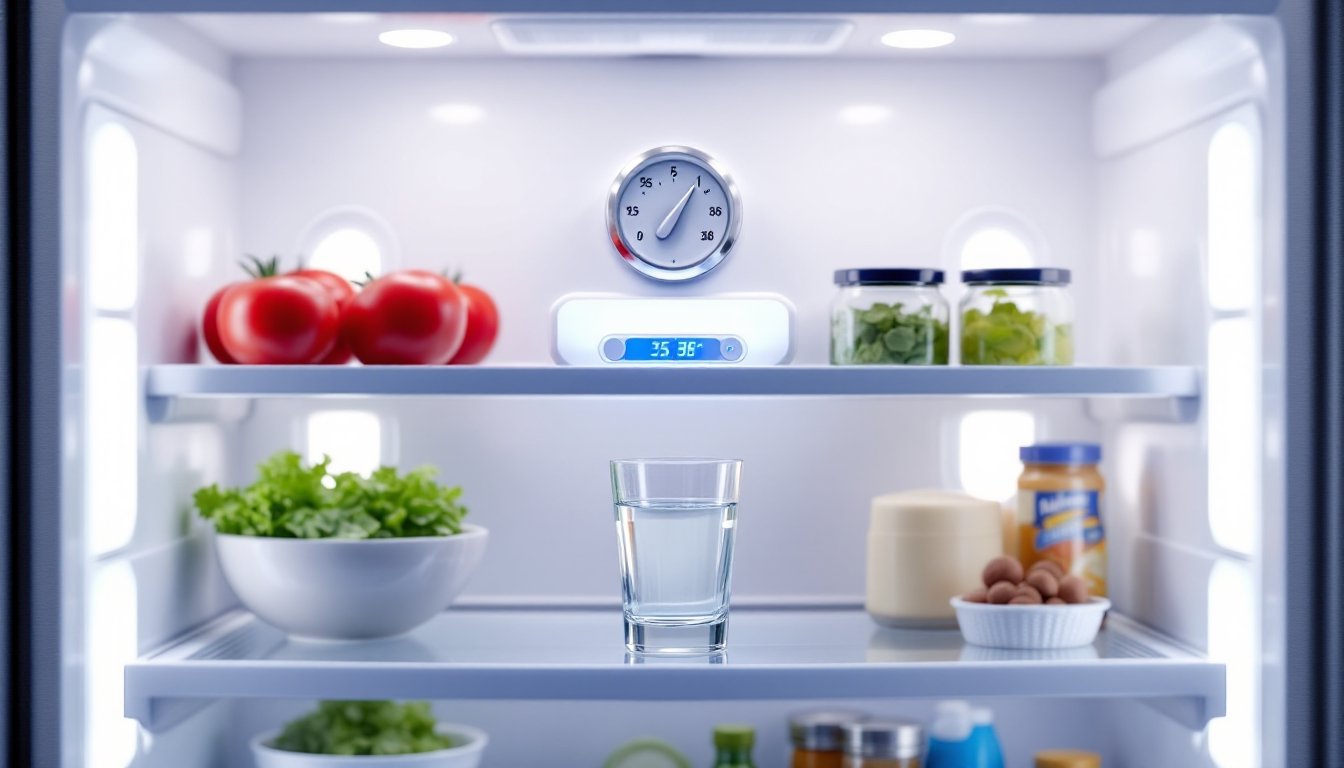
Temperature Monitoring prevents food spoilage and appliance strain. Keep the fridge section at 35-38°F and the freezer at 0°F. Fluctuations suggest a failing thermostat or restricted airflow between compartments. Many modern KitchenAid units have digital displays that log temperature: use them.
Water Line Maintenance applies to units with ice makers or water dispensers. Sediment and minerals buildup in the inlet valve and supply line over time. If water flow slows or ice quality declines, request a professional flush (typically $150–$250) rather than ignoring it. Preventive maintenance here avoids expensive leaks that damage cabinetry.
Seek professional service if you notice frost buildup on coils, inconsistent temperatures even though adjusted settings, or unusual compressor noise. Interior ice formation especially signals a failing damper or seal, don’t delay. Kitchen design sites like The Kitchn feature helpful troubleshooting guides if you want to research common issues before calling a technician.
Conclusion
A KitchenAid built-in refrigerator is an investment in both aesthetics and functionality. Whether you opt for a standard 30-inch model or a KitchenAid 48 inch refrigerator, success hinges on meticulous planning, professional installation, and consistent maintenance. Measure twice, verify ventilation and electrical requirements, and don’t skip the coil cleaning. When done right, these appliances become the reliable, sleek centerpiece of a kitchen you’ll enjoy for decades.